A finished renovation should feel exciting. The paint is fresh, the cabinets are installed, and the room finally looks the way you imagined. Then the sunlight comes through the window—and reveals a fine layer of construction dust on nearly everything.
Renovation dust does not stay inside the work area. It settles on trim, window ledges, light fixtures, floors, furniture, vents, and other horizontal surfaces. It may even reappear after the first cleaning as airborne particles settle.
Whether you remodeled a kitchen in Walla Walla, updated a bathroom in College Place, or completed repairs elsewhere in the Walla Walla Valley, a deliberate post-renovation cleaning helps turn a worksite back into a comfortable home.
This guide explains what to clean, the right order for tackling dust, what to complete before a professional cleaning team arrives, and when a project may require a specialist rather than routine house cleaning.
Quick Answer: What Does Post-Renovation Cleaning Include?
Post-renovation cleaning generally includes:
- Removing remaining fine dust from accessible surfaces
- Wiping walls, doors, trim, baseboards, and ledges as appropriate
- Cleaning cabinet and drawer interiors when included in the scope
- Dusting reachable light fixtures, vents, fans, and hardware
- Vacuuming carpets and appropriate upholstered surfaces
- Cleaning hard floors using surface-safe methods
- Cleaning kitchens and bathrooms affected by the project
- Removing smudges, labels, and light residue when safe to do so
- Checking corners and horizontal surfaces for dust that settled after the first pass
It usually does not include removing construction debris, handling hazardous materials, cleaning active work areas, repairing damaged finishes, or performing specialized lead, asbestos, mold, or silica remediation. The exact scope should always be confirmed before the cleaning appointment.
Why Renovation Dust Is Different From Everyday Dust
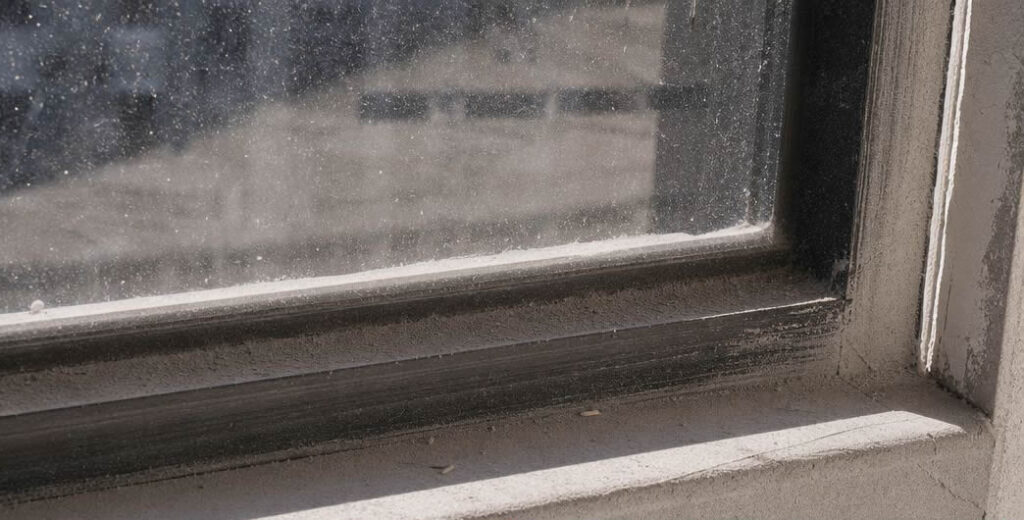
Ordinary household dust accumulates gradually. Renovation work can create a concentrated mixture of drywall dust, sawdust, tracked-in soil, packaging residue, and particles from cutting or sanding materials.
Because some of those particles are extremely fine, quickly running a standard vacuum around the room may not solve the problem. Dust can pass through an unsuitable filter or be pushed back into the air. Dry sweeping may also spread fine particles from one surface to another.
A better approach is systematic:
- Remove large debris before detailed cleaning begins.
- Work from higher surfaces toward lower ones.
- Use equipment and methods suited to the material involved.
- Clean adjoining rooms and pathways, not only the renovated room.
- Inspect the home again after disturbed dust has had time to settle.
Before Cleaning: Make Sure the Renovation Is Truly Finished
Detailed cleaning should be one of the final steps—not something that happens while contractors are still sanding, cutting, drilling, or walking through the room.
Before scheduling a post-renovation cleaning, confirm that:
- Contractors have finished dust-producing work
- Tools and construction materials have been removed
- Scrap wood, drywall, packaging, fasteners, and other debris are gone
- Paint, caulk, grout, sealants, and floor finishes have cured enough to clean safely
- Plumbing and electrical work is complete
- Fixtures, cabinets, appliances, and hardware are securely installed
- The renovation contractor has completed the initial jobsite cleanup
- The cleaning team can safely access the home
If contractors return after the detailed cleaning, they may create another layer of dust. Ask the project manager for the realistic completion date and schedule cleaning after the final work and walkthrough.
Important Safety Check for Older Walla Walla Homes
Walla Walla and surrounding communities have many older homes. If renovation work disturbed painted surfaces in a home built before 1978, lead-safe practices may be necessary.
The Environmental Protection Agency warns that renovation, repair, or painting in pre-1978 homes with lead-based paint can create hazardous lead dust. Contractors performing covered work are generally required to follow the EPA’s Renovation, Repair and Painting requirements.
A standard cleaning company should not be used as a substitute for certified lead-hazard work. Before arranging routine post-renovation cleaning, ask the contractor:
- Was the home or affected surface tested for lead-based paint?
- Was the work performed by an EPA lead-safe certified firm when required?
- Has the contractor completed the required cleaning and verification?
- Is the work area cleared for normal occupancy and routine cleaning?
Similar caution applies if the project involved suspected asbestos, mold contamination, sewage, chemicals, or substantial concrete or stone dust. Ask the responsible contractor or qualified environmental professional whether specialized remediation is needed before bringing in a general house-cleaning team.
Complete Post-Renovation Cleaning Checklist
Every project is different, but the following checklist covers the areas most homeowners should review.
Entryways and the path through the home
Workers, materials, and tools often travel well beyond the renovated room. Inspect the entire route from the entrance to the work area.
- Wipe doors, handles, locks, and surrounding trim
- Clean entry flooring, mats, and thresholds
- Dust nearby ledges, railings, and baseboards
- Check adjacent walls for marks or dust
- Vacuum or mop hallways used during construction
- Clean stair treads and railings when applicable
Walls, ceilings, doors, and trim
Not every painted surface can be cleaned the same way. Newly painted walls may need additional curing time, and flat paint can mark easily. Confirm the correct method before wiping.
- Remove visible cobwebs and loose dust
- Dust walls using an appropriate tool or method
- Wipe doors and doorframes
- Clean baseboards, crown molding, and window trim
- Check corners and the tops of doorframes
- Remove fingerprints and light smudges where the finish allows
- Avoid aggressive scrubbing on new or delicate finishes
Windows and window coverings
Fine particles settle in window tracks and on blinds, especially when windows were open during the project.
- Dust window frames, sills, and tracks
- Clean interior glass when included
- Dust blinds or shutters
- Vacuum suitable curtains using the appropriate attachment
- Check screens for construction dust
- Remove stickers only when doing so will not damage coatings or finishes
Exterior glass, high windows, paint overspray, silicone, adhesives, and scraper work may require separate approval or a window-cleaning specialist.
Cabinets, closets, shelves, and drawers
Cabinetry can collect dust inside even when the doors remained closed.
- Wipe cabinet fronts and handles
- Clean accessible shelf surfaces
- Clean empty cabinet and drawer interiors if included
- Dust closet rods and upper shelves
- Wipe the tops of cabinets when safely reachable
- Inspect corners and hardware for fine dust
Emptying cabinets before cleaning produces the best result. If items have already been replaced, ask whether the cleaning company moves and replaces them.
Light fixtures, switches, vents, and fans
These details are easy to overlook but quickly reveal remaining dust.
- Wipe switch plates and outlet covers
- Dust reachable light fixtures and fan blades
- Clean vent and return-air grilles where appropriate
- Wipe thermostats and control panels carefully
- Check smoke and carbon-monoxide detector exteriors
- Dust the tops of accessible wall-mounted fixtures
Electrical components should never be saturated. Turn off power when the manufacturer or cleaning method requires it, and leave internal electrical cleaning to qualified professionals.
Kitchen
A kitchen remodel creates many surfaces where dust can hide.
- Clean countertops and backsplashes
- Wipe cabinet fronts, handles, and accessible interiors
- Clean the sink, faucet, and surrounding fixtures
- Wipe appliance exteriors
- Clean empty appliance interiors when included
- Dust the tops and sides of appliances when accessible
- Wipe shelves, pantry surfaces, and trim
- Vacuum edges, corners, and toe-kick areas
- Clean the floor using a method appropriate for the new material
Construction dust should be removed before food, dishes, cookware, and pantry items are put back.
Bathrooms
Bathroom renovation residue can collect around grout lines, fixtures, cabinetry, and ventilation grilles.
- Clean the vanity, sink, faucet, and mirror
- Wipe cabinet fronts and accessible interiors
- Clean the toilet, tub, and shower
- Dust vents, ledges, and light fixtures
- Wipe doors, trim, and baseboards
- Clean flooring appropriately
- Check for removable labels and light installation residue
Do not aggressively scrub new grout, caulk, sealant, or specialty finishes until the contractor confirms that they have cured.
Floors and carpets
Floors should usually be cleaned near the end because dust from higher surfaces falls downward.
- Vacuum edges, corners, and beneath accessible furniture
- Vacuum carpets slowly with suitable filtration
- Use the correct cleaner for hardwood, laminate, luxury vinyl, tile, or stone
- Avoid excessive water on moisture-sensitive flooring
- Check manufacturer instructions for newly installed materials
- Inspect flooring again after the room has dried
Never assume a strong chemical is safe for a new surface. Natural stone, sealed wood, specialty tile, and some luxury flooring products have specific care requirements.
Furniture and belongings
Furniture outside the immediate work zone may still collect dust.
- Dust hard furniture surfaces
- Vacuum suitable upholstery with the correct attachment
- Clean beneath and behind movable pieces when included
- Wipe picture frames and decorative objects
- Launder washable textiles when necessary
- Replace belongings only after shelves and storage areas are clean and dry
Discuss large, fragile, valuable, or unusually heavy items before the appointment. Cleaning teams may have safety limits on what they can move.
The Best Order for Cleaning After a Remodel
Cleaning in the wrong order creates extra work. A practical sequence is:
1. Remove debris and unfinished materials
The renovation contractor should remove construction waste, sharp objects, scrap materials, and equipment first.
2. Confirm that hazardous-material requirements are complete
Do not begin ordinary cleaning until any required lead, asbestos, mold, chemical, or silica controls have been handled by the appropriate professionals.
3. Begin with high surfaces
Start with the tops of cabinets, ledges, fixtures, trim, vents, and other elevated surfaces. Work downward so falling dust is collected later.
4. Clean vertical and mid-level surfaces
Move to walls where appropriate, doors, cabinetry, counters, appliances, windows, and furnishings.
5. Clean floors last
Vacuum or mop only after higher surfaces have been addressed.
6. Allow dust to settle and inspect again
Fine particles may settle after the first pass. Recheck ledges, floors, dark surfaces, and rooms adjoining the construction area.
What Should the Contractor Clean?
The renovation contractor and the house-cleaning company have different responsibilities.
The contractor should generally leave the site safe and remove:
- Construction debris
- Scrap materials and packaging
- Tools and equipment
- Loose nails, screws, blades, and sharp objects
- Substantial piles of dust or material created by the work
- Protective floor coverings and containment materials, when appropriate
A cleaning company can then focus on detailed cleaning of the home’s accessible surfaces. Ask both providers what their service includes so an important task does not fall between the two scopes.
How to Prepare for Professional Post-Renovation Cleaning
A little preparation helps the cleaning team work efficiently.
Share the project details
Explain:
- Which rooms were renovated
- What work was performed
- Which materials and finishes are new
- Whether other rooms were used as work or storage areas
- Whether the home was occupied during construction
- Whether the contractor identified any hazardous-material concerns
Provide care instructions
Leave manufacturer or contractor instructions for new flooring, stone, tile, cabinetry, countertops, appliances, grout, and paint.
Remove personal items when possible
Emptying shelves, cabinets, counters, and floors allows more surfaces to be cleaned. Secure valuables, documents, medication, and fragile belongings.
Identify priorities
If time or budget requires a focused scope, prioritize the renovated room, adjacent areas, the path used by workers, kitchens, bathrooms, bedrooms, and frequently touched surfaces.
Arrange access and parking
Make sure the team can enter the property, park legally, and access water and electricity if required.
Keep children and pets away from the work area
This protects them from dust, equipment, open doors, damp floors, and cleaning products while allowing the team to work efficiently.
DIY or Professional Cleaning: Which Is Right for You?
DIY post-renovation cleaning may be reasonable after a small, well-contained project when:
- The contractor completed a thorough initial cleanup
- No hazardous materials are involved
- Only one small area is affected
- You have appropriate equipment and time
- The new surfaces have clear care instructions
Professional cleaning may be worthwhile when:
- Dust spread into several rooms
- The renovation involved a kitchen, multiple bathrooms, flooring, or extensive drywall work
- Cabinets, closets, and detailed surfaces need attention
- You are preparing to move back into the space
- You have a deadline for guests, tenants, a home sale, or a final walkthrough
- You want an agreed cleaning scope and trained team
The right choice depends on the project, the condition of the home, and what the contractor has already completed.
Questions to Ask Before Booking
Before hiring a cleaning service after construction or remodeling, ask:
- Do you provide post-renovation or one-time deep cleaning?
- What must the contractor complete before your team arrives?
- Which rooms and surfaces are included in the estimate?
- Do cabinet, drawer, appliance, and window interiors cost extra?
- What types of construction residue do you not remove?
- What equipment or filtration do you use for fine dust?
- Are there height or furniture-moving limitations?
- Are you licensed, bonded, and insured?
- How should I prepare the home?
- What happens if an area does not meet the agreed expectations?
A reputable company should be willing to define the scope clearly before work begins.
Frequently Asked Questions
How long should I wait to clean after a renovation?
Wait until dust-producing work is complete, debris and tools are removed, and new finishes have cured enough to clean safely. Ask the contractor about the drying or curing requirements for paint, grout, caulk, sealants, flooring, and countertops before scheduling.
Is post-renovation cleaning the same as regular house cleaning?
No. Regular cleaning maintains an occupied home. Post-renovation cleaning usually requires more detailed dust removal, attention to adjoining rooms, and extra care around newly installed materials.
Will one cleaning remove all construction dust?
It depends on the project and how well the work area was contained. Fine dust can settle after the initial cleaning, so a second inspection or touch-up may be appropriate after larger renovations.
Can cleaners remove paint, grout, adhesive, or caulk from new surfaces?
Possibly, but these tasks should be discussed in advance. Removing hardened construction residue can damage glass, flooring, stone, metal, or finished surfaces. The installer may be the right person to correct substantial residue or installation defects.
Who removes construction debris?
The renovation contractor should normally remove building materials, scrap, packaging, sharp objects, and construction waste before detailed house cleaning begins. Confirm this responsibility in the renovation contract.
Can a regular cleaning company clean lead or asbestos dust?
Routine cleaning should not replace specialized hazardous-material work. If lead, asbestos, mold, or another hazardous material may be present, consult the renovation contractor or a properly qualified remediation professional before scheduling ordinary cleaning.
Does Above the Line Cleaning serve areas outside Walla Walla?
Above the Line Cleaning serves Walla Walla, College Place, Dayton, Waitsburg, Milton-Freewater, Pendleton, Hermiston, and additional communities across the Walla Walla Valley, northeastern Oregon, and the Tri-Cities area. Confirm availability for your property when requesting a quote.
Enjoy the Result of Your Renovation—Without the Lingering Dust
The construction may be finished, but detailed cleaning is what helps the new space finally feel like home. A clear plan protects new finishes, catches dust beyond the work zone, and prevents homeowners from spending the first weekend after a remodel cleaning every ledge and baseboard.
Above the Line Cleaning provides customized one-time and deep-cleaning services for homes in Walla Walla, College Place, and surrounding communities. Our trained team takes security, communication, and customer feedback seriously, and we tailor the cleaning plan to the condition of your home.
Learn more about our house cleaning services or request a free cleaning quote for your post-renovation cleaning.
You can also call 509-240-9160 to discuss your project and service area.
Resources:
- EPA, Lead-Safe Renovations for DIYers: https://www.epa.gov/lead/lead-safe-renovations-diyers
- EPA, Renovation, Repair and Painting Program: https://www.epa.gov/lead/lead-renovation-repair-and-painting-program
- OSHA, Respirable Crystalline Silica—Construction: https://www.osha.gov/silica-crystalline/construction-info